Top

7 Tips for Buying Decorative Veneer Plywood

Decorative Veneer Plywood is no longer chosen only for attractive grain. Buyers now assess appearance, stability, emissions, sourcing, and long-term performance. The FAO’s Global Forest Products Facts and Figures 2022 reported nearly 400 million cubic metres of global wood-based panel production. That scale creates more choices, but it also increases quality differences between suppliers.

The details matter.

A walnut-look panel may use a natural veneer, reconstructed veneer, or printed surface. Each option changes color consistency, repairability, and price. The USDA Forest Products Laboratory’s Wood Handbook explains that moisture movement affects wood products differently across grain directions. That principle helps explain why core construction and balancing layers deserve careful inspection. A beautiful face cannot compensate for warping.

Certification also requires attention. FSC chain-of-custody documentation can support responsible sourcing, while laboratory test reports can clarify formaldehyde emissions and bonding performance. In the United States, EPA TSCA Title VI establishes emissions requirements for composite wood products. Other markets may apply different standards, so assumptions can become expensive.

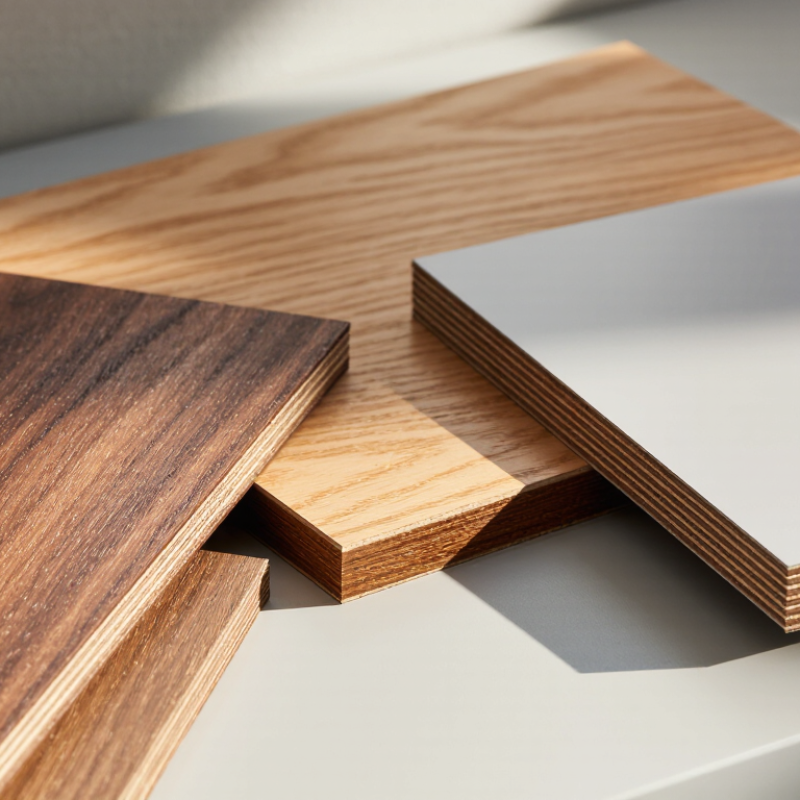
This guide presents seven practical buying tips for Decorative Veneer Plywood. It covers veneer species, grade, thickness, core quality, surface defects, certification, and supplier verification. Look closely at sample edges, not just showroom faces. Check for open joints, telegraphing, delamination, and uneven sanding under side lighting.

One point deserves reflection. The lowest quotation may not represent the lowest total cost. Rejected panels, color mismatch, and installation delays can quickly outweigh a modest saving. Reliable decisions come from comparing documented specifications with real samples, while admitting that one sample cannot predict every production batch.
7 Tips for Buying Decorative Veneer Plywood

Define Your Project’s Purpose, Style, and Performance Needs

7 Tips for Buying Decorative Veneer Plywood

Define Your Project’s Purpose, Style, and Performance Needs

Start with the room. Define what the panel must do before judging its grain. A cabinet door needs a stable, smooth face and clean edges. Wall cladding may prioritize warmth, acoustic backing, or easy maintenance. A dining table demands resistance to abrasion, spills, and repeated wiping. During project planning, a quick sketch with dimensions prevents attractive but unsuitable purchases. Measure openings twice. Looks deceive.

Style should support the room, not overpower it. View veneer samples in daylight, warm lamps, and near existing flooring. Grain direction changes the perceived width of a door or wall. Book-matched faces look formal, while straight grain often suits smaller spaces. Ask for a full-size sample when possible. Small samples hide knots, color shifts, and joint lines. I once underestimated this difference; the installed panel looked darker than expected.

Performance depends on construction, not appearance alone. Check the plywood thickness, veneer quality, core uniformity, edge condition, and intended use in dry or humid areas. Confirm moisture guidance and indoor air-emissions documentation from the supplier. Seal exposed edges, especially around sinks or floor-level cabinets. Use compatible adhesives and finishes, then allow the panels to acclimate as directed. Do not expect a glossy coating to fix poor substrate preparation. That shortcut often fails. For unusual loads, ask a qualified professional to verify the specification before cutting.

7 Tips for Buying Decorative Veneer Plywood

Define Your Project’s Purpose, Style, and Performance Needs

Panel thickness should match the project’s structural and visual requirements. These commonly used thickness ranges provide a practical starting point for decorative interior applications.

Buying reminder: Treat these thicknesses as common starting points rather than universal specifications. Confirm the required span, load, moisture exposure, veneer appearance, core quality, and formaldehyde-emission rating before purchase.

Choose the Right Veneer Species, Grain Pattern, and Finish

Decorative veneer plywood should begin with the veneer species, not the price. Oak offers visible pores and a familiar, durable appearance. Walnut creates deeper color and a calmer visual rhythm. Maple looks clean, but its pale surface reveals stains and sanding marks easily. Match the species with the room’s lighting, moisture level, and daily use. A kitchen panel needs more practical judgment than a sample board suggests.

Grain pattern changes the entire surface. Plain-sliced veneer gives cathedral shapes and a warmer, more traditional feel. Quarter-sliced veneer produces straighter lines with a restrained, architectural look. Rotary-cut veneer can appear broader and more dramatic. Hold several sheets together before buying. Check whether the grain flows across adjacent panels. Small mismatches become obvious on tall cabinet doors. I once trusted a single sample and regretted it.

Finish affects both color and maintenance. View the plywood under natural daylight, then inspect it under warm indoor light. A clear matte finish preserves a soft, natural appearance. Satin finishes add depth without creating excessive glare. High-gloss coatings highlight unevenness, fingerprints, and surface repairs. Confirm that the finish suits the veneer’s porosity. Test an offcut when possible. Sand lightly, because decorative veneer can be surprisingly thin. Check the panel edges and core for voids, loose layers, or uneven construction. These details often matter more after installation than they did in the showroom.

Check Plywood Grade, Core Quality, Thickness, and Panel Stability

7 Tips for Buying Decorative Veneer Plywood

Check the face grade before admiring the color. A clear face can still hide open knots, repaired splits, or uneven veneer joints. Ask for the grading standard and inspect both sides under angled light. APA PS 1 separates veneer quality by knot size, splits, patches, and surface defects. That detail matters when panels become cabinet doors or wall features.

Core quality deserves equal attention. Look at the cut edge for voids, overlaps, and uneven layers. Tap the panel lightly; hollow sounds may indicate internal gaps. Compare the measured thickness with the stated size. Small differences can disrupt grooves, edge bands, and door alignment. The USDA Forest Products Laboratory’s Wood Handbook notes that wood-based panels respond to moisture changes, even when factory-made. Decorative plywood is not perfectly inert.

Panel stability depends on storage and construction, not only the label. The same handbook reports typical indoor equilibrium moisture content near 6–14%, depending on climate and heating. Let panels acclimate in the installation room, with spacers between sheets. Check flatness using a straightedge across the face. A slight bow may disappear; a twisted panel usually will not. I would also recheck the core after cutting, because a good-looking surface can conceal weak support. This step is often skipped. That is a mistake. (USDA Forest Products Laboratory, Wood Handbook, 2021; APA PS 1)

Compare Suppliers, Certifications, Pricing, and Available Sizes

Tip 1: Compare suppliers using identical specifications. Request face species, core composition, thickness tolerance, formaldehyde class, and recent production samples. Decorative plywood can look similar online but perform differently under changing humidity. The FAO Forestry Production and Trade database reported global plywood output above 170 million cubic metres in 2022. That scale creates wide quality differences.

Tip 2: Verify certifications directly. Look for FSC or PEFC chain-of-custody documentation when responsible sourcing matters. Also request test reports for emissions, bonding strength, and surface durability. A certificate logo alone proves little.

Tip 3: Compare complete pricing, not only the sheet price. Include cutting, packaging, freight, taxes, minimum orders, and replacement allowances. The U.S. Bureau of Labor Statistics tracks plywood price movements, but its index does not isolate decorative veneer grades. Actual quotations may vary sharply by species and finish.

Tip 4: Confirm available sizes before designing furniture or wall panels. Common formats include 1220 × 2440 mm and 1525 × 3050 mm, but regional stock differs.

Tip 5: Ask suppliers to reserve matching veneer lots. Natural grain changes between batches.

Tip 6: Inspect edges, flatness, patching, and veneer seams under bright light.

Tip 7: Order a sample panel first. I once underestimated color variation between samples and full production. That mistake was avoidable. Supplier comparison should include responsiveness, documentation quality, and how clearly problems are handled.

Inspect Samples and Plan for Proper Storage, Cutting, and Installation

When buying decorative veneer plywood, inspect full-size samples under the room’s actual lighting. Small samples can hide color shifts, open veneer joints, or uneven grain. Check the face for bubbles, sanding marks, patches, and loose edges. Examine the core too. Tight, consistent plies usually indicate better machining stability. The USDA Forest Products Laboratory’s Wood Handbook reports that indoor wood commonly reaches 6–8% moisture content. Ask suppliers for moisture data when possible.

Storage matters immediately after delivery. Keep sheets flat, fully supported, and away from concrete floors, heaters, and direct sunlight. Cover the stack, but allow limited air circulation. Do not lean panels against a wall for several days. That shortcut can create permanent bowing. Acclimate plywood in the installation room, especially before cabinet or wall work. The APA Engineered Wood Association identifies moisture exposure and unsupported storage as major causes of panel movement and surface defects.

Cut from a stable table using a sharp, fine-tooth blade. Support both sides of the cut to reduce splintering. For veneered faces, test the cutting direction on an offcut first. Leave the manufacturer’s recommended expansion space during installation, even when the room seems dry. Seal exposed edges where moisture may enter. Even careful inspection is not foolproof; one overlooked flatness problem can become a visible joint after installation. Conforming to local building requirements and the panel’s technical data remains essential.

Article Source: